If you have ever wanted to make fresh pasta without a machine, the orecchiette recipe is the perfect place to start in your kitchen.
These small, cup-shaped pasta pieces come from Puglia in southern Italy, and they are made with just two ingredients: flour and water. No eggs, no equipment, no stress. Once you learn to shape them, you will wonder why you ever bought pasta from a box. You can easily make it in your kitchen, which is more tasty and healthy than the market.
What Is Orecchiette and Where Does It Come From?
Orecchiette originates from the Puglia region of southern Italy and has been a staple there since the 12th century. The name literally means “little ears” in Italian, which perfectly describes its small, concave shape. That unique shape is not just for looks. The slight cup holds onto chunky sauces and hearty vegetables beautifully, making every bite full of flavor.
In the old city of Bari, you can still find women making and selling fresh orecchiette right on the street, a tradition that attracts visitors from all over the world. Making them at home connects you to that same rich culinary heritage, and it is far more satisfying than any store-bought version.
Homemade Orecchiette Ingredients
This recipe needs almost nothing. That simplicity is exactly what makes it so beautiful. All these ingredients are easily available in the market.
| Ingredient | Amount | Notes |
| Semola rimacinata flour | 320g (about 2 cups) | Fine durum wheat flour, not coarse semolina |
| Lukewarm water | 160ml (about ⅔ cup) | Slightly warm, not hot |
| Salt | Pinch | Optional, traditional recipe skips it |
That is it. Two ingredients and a little patience are all you need to make authentic orecchiette from scratch.
The Difference Between Semolina and Semola
This is the single most important thing to understand before you start, and it confuses many home cooks.
Both semolina and semola are made from the same durum wheat, but they are milled differently. Semola rimacinata is a much finer grind and is the correct flour to use for orecchiette dough. Standard semolina is coarser and is better used for dusting trays to prevent sticking.
Semolina flour has a higher gluten content compared to all-purpose flour, which gives orecchiette its distinctive chewiness and helps the shape hold together properly. If you use all-purpose flour, the pasta will be softer, less chewy, and will overcook much more quickly.
Here is a quick comparison to make it clear:
| Flour Type | Grind | Best Used For |
| Semola rimacinata | Very fine | Orecchiette dough, pasta dough |
| Coarse semolina | Rough, grainy | Dusting trays, gnocchi, bread |
| All-purpose flour | Fine | Egg pasta, baking |
| 00 flour | Very fine | Egg pasta, pizza dough |
When shopping, look for packaging that says “semola di grano duro rimacinata.” Italian brands like De Cecco, Caputo, and La Molisana are widely available and work perfectly. You can make it perfect if you follow all the steps that I tell you to do.
How to Make the Orecchiette Dough
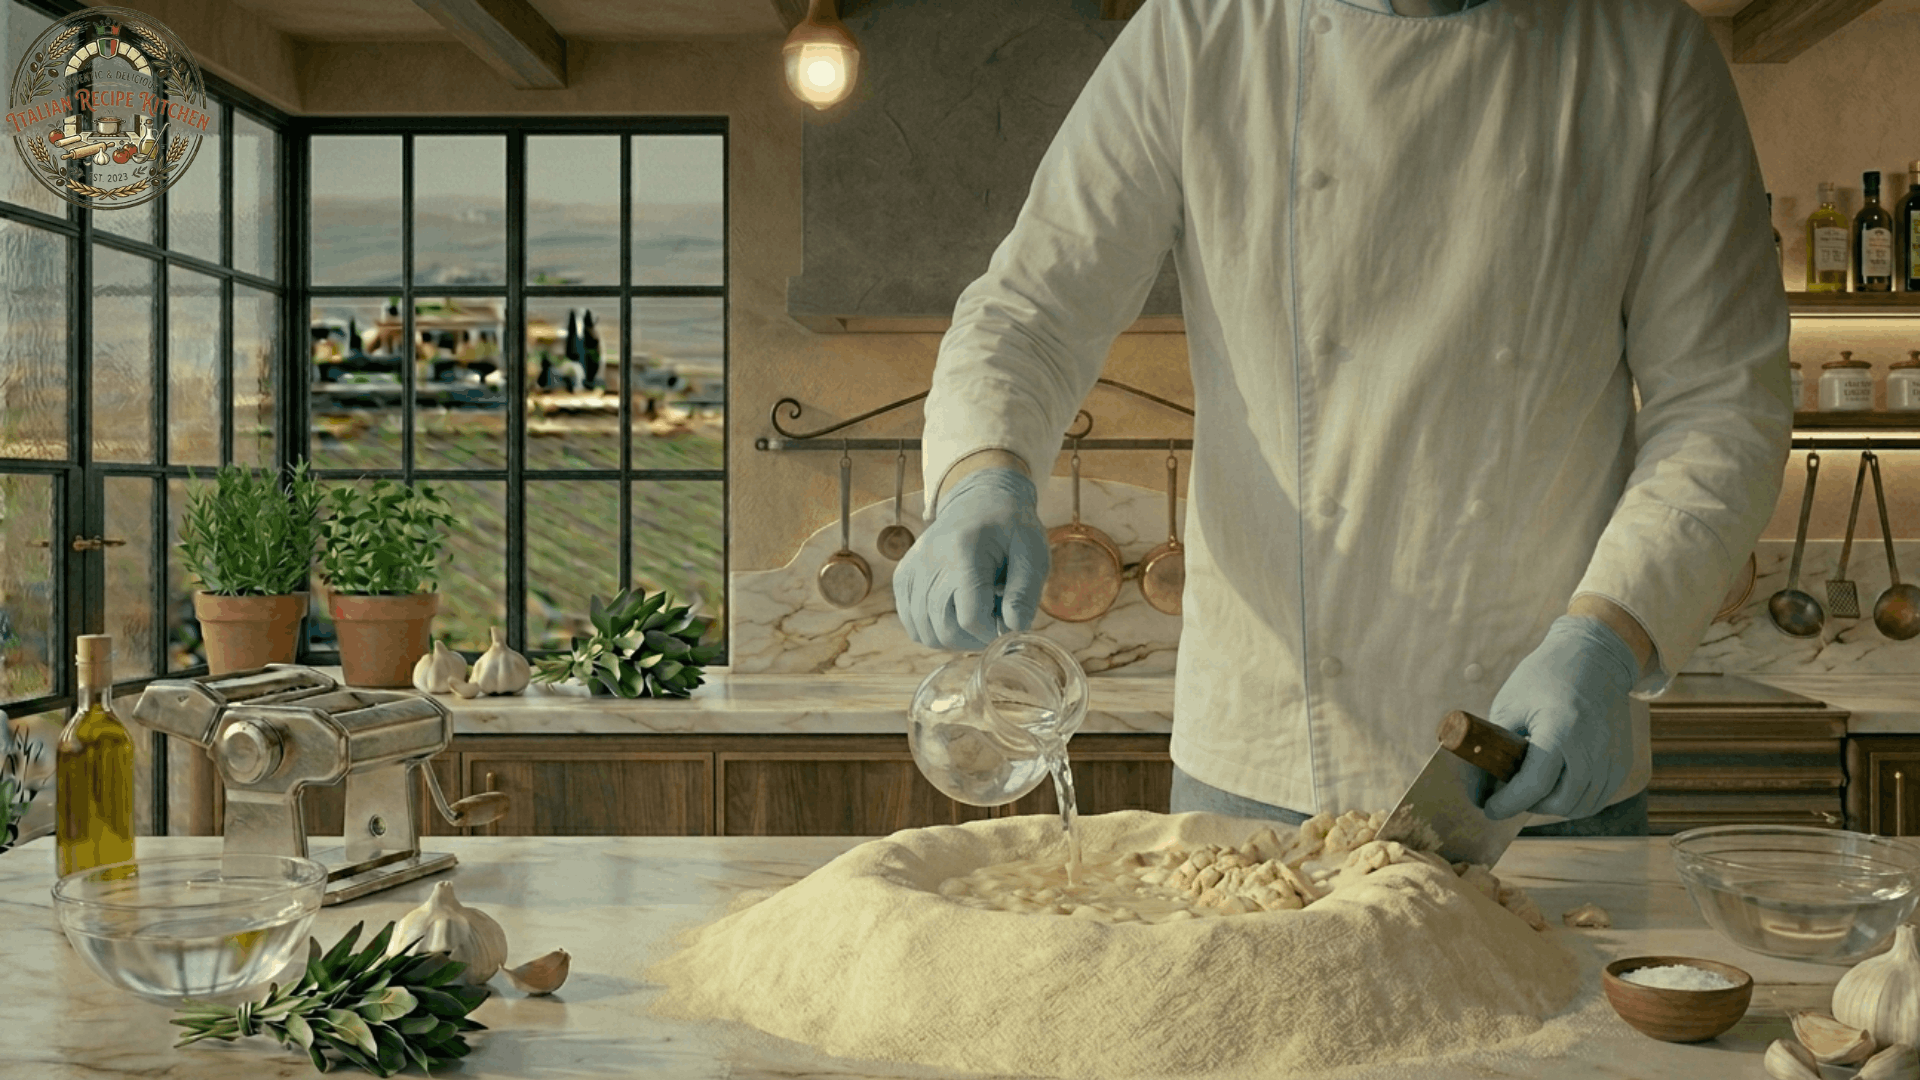
Step 1: Form the Dough
Mound the semola flour on a clean work surface and create a well in the center. Pour the lukewarm water slowly into the well and begin incorporating the flour from the inside edges using your fingers or a fork. If you are using fingers, then use gloves. As you keep bringing flour into the water, it will go from a loose liquid to a thick paste and eventually form a shaggy dough. Use a bench scraper to gather any loose bits.
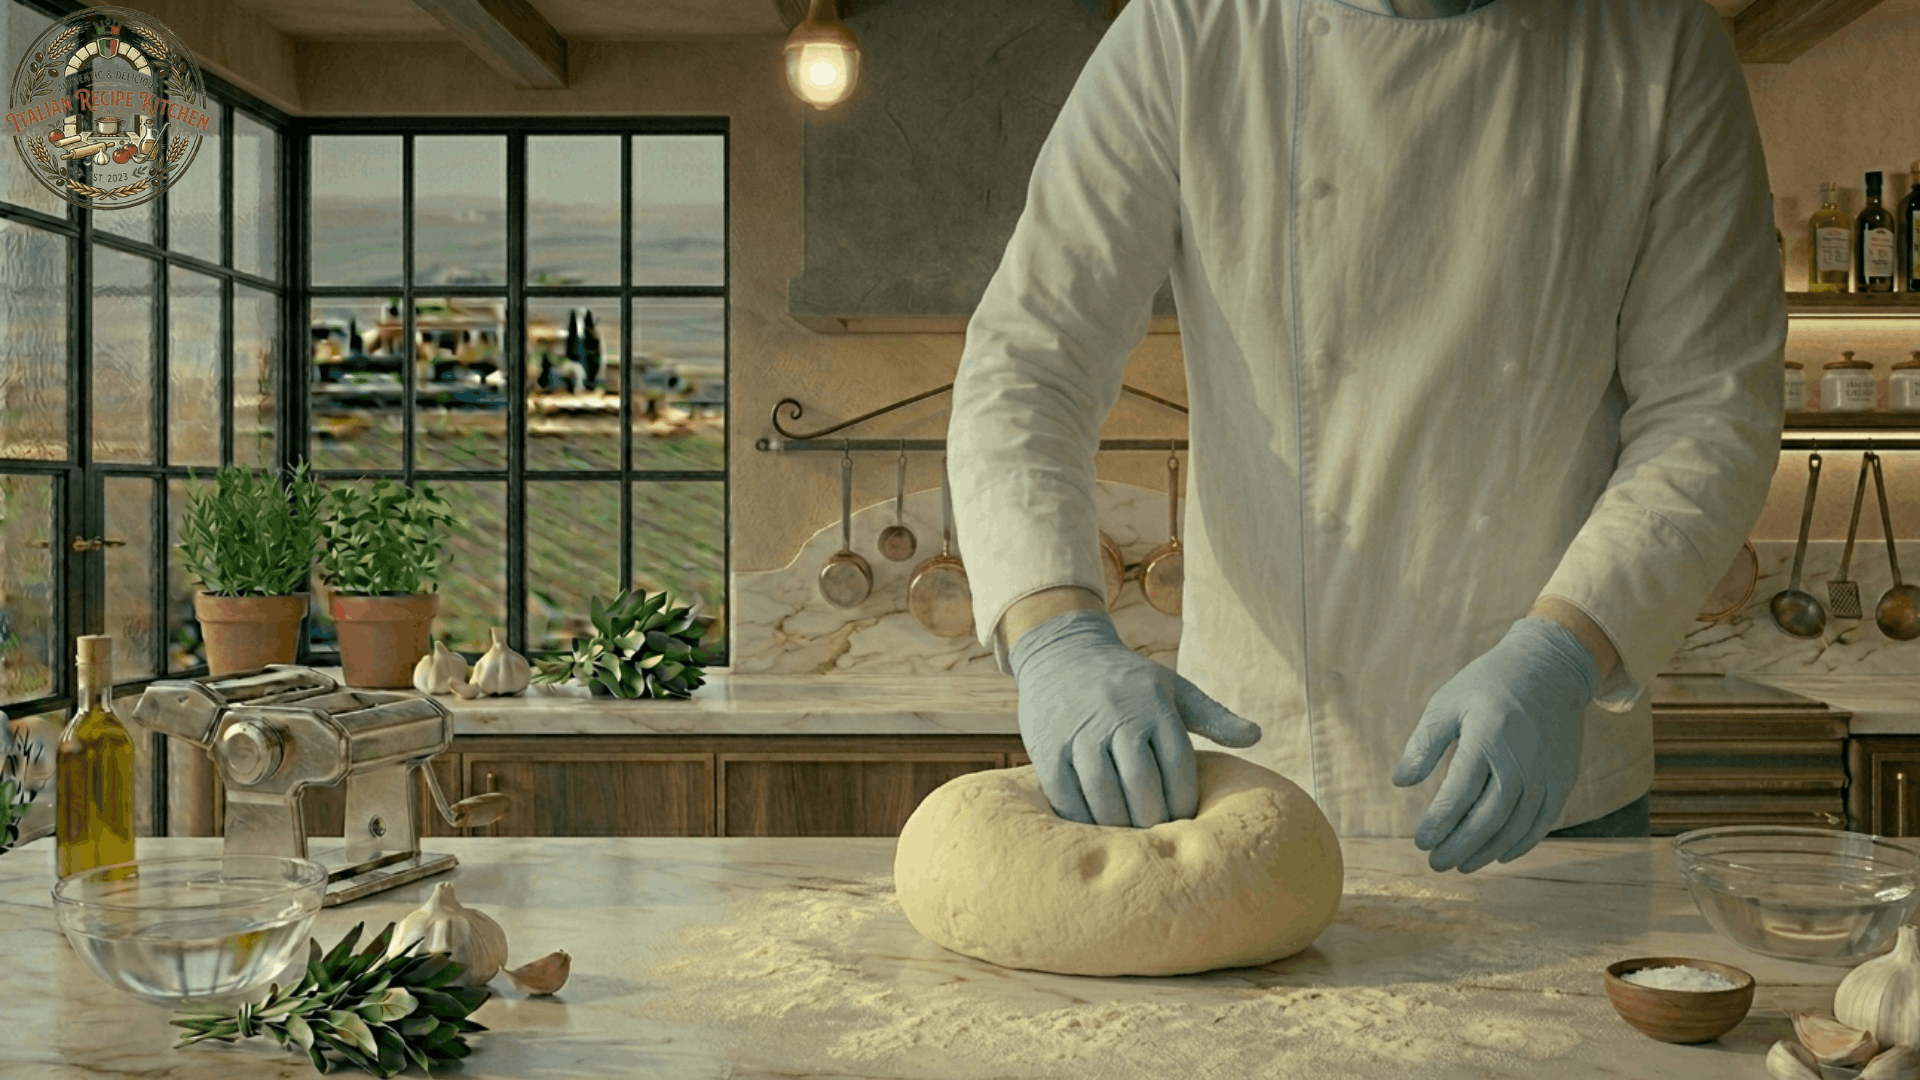
Step 2: Knead Until Smooth
Once everything comes together, knead the dough firmly for 8 to 10 minutes. Press the heel of your hand into the dough to stretch it, then rotate and repeat until it is perfect. You will know it is ready when you press a thumb into the surface, and the dough springs back immediately. The final dough should feel smooth and slightly firm, not sticky, which is the perfect dough.
Step 3: Rest the Dough
Wrap the dough in plastic wrap or cover with a damp cloth and let it rest for at least 20 to 30 minutes. Resting is essential because it allows the gluten to relax, which makes rolling and shaping the dough much easier. Do not skip this step, or you will struggle with every piece you try to shape.

Shaping the Orecchiette
This is the part that takes a little practice, but quickly becomes meditative and fun, and very easy to make if you are not worried about it.
- Divide the remaining dough into four portions. Keep the rest covered while you work with one piece.
- Roll each portion into a thin rope about the thickness of a pencil, roughly half an inch in diameter.
- Cut the rope into small pieces, about a quarter inch long each. (Cut it properly)
- Place a knife flat on top of a piece of dough and press down firmly while dragging it toward you across the board. The scraping action of the knife creates a rough texture on the surface, which is essential for sauces to cling to later.
- Lift the little disc of pasta and press it over your thumb to flip it inside out, creating the classic ear shape.
- Place finished orecchiette on a lightly floured tray in a single layer.
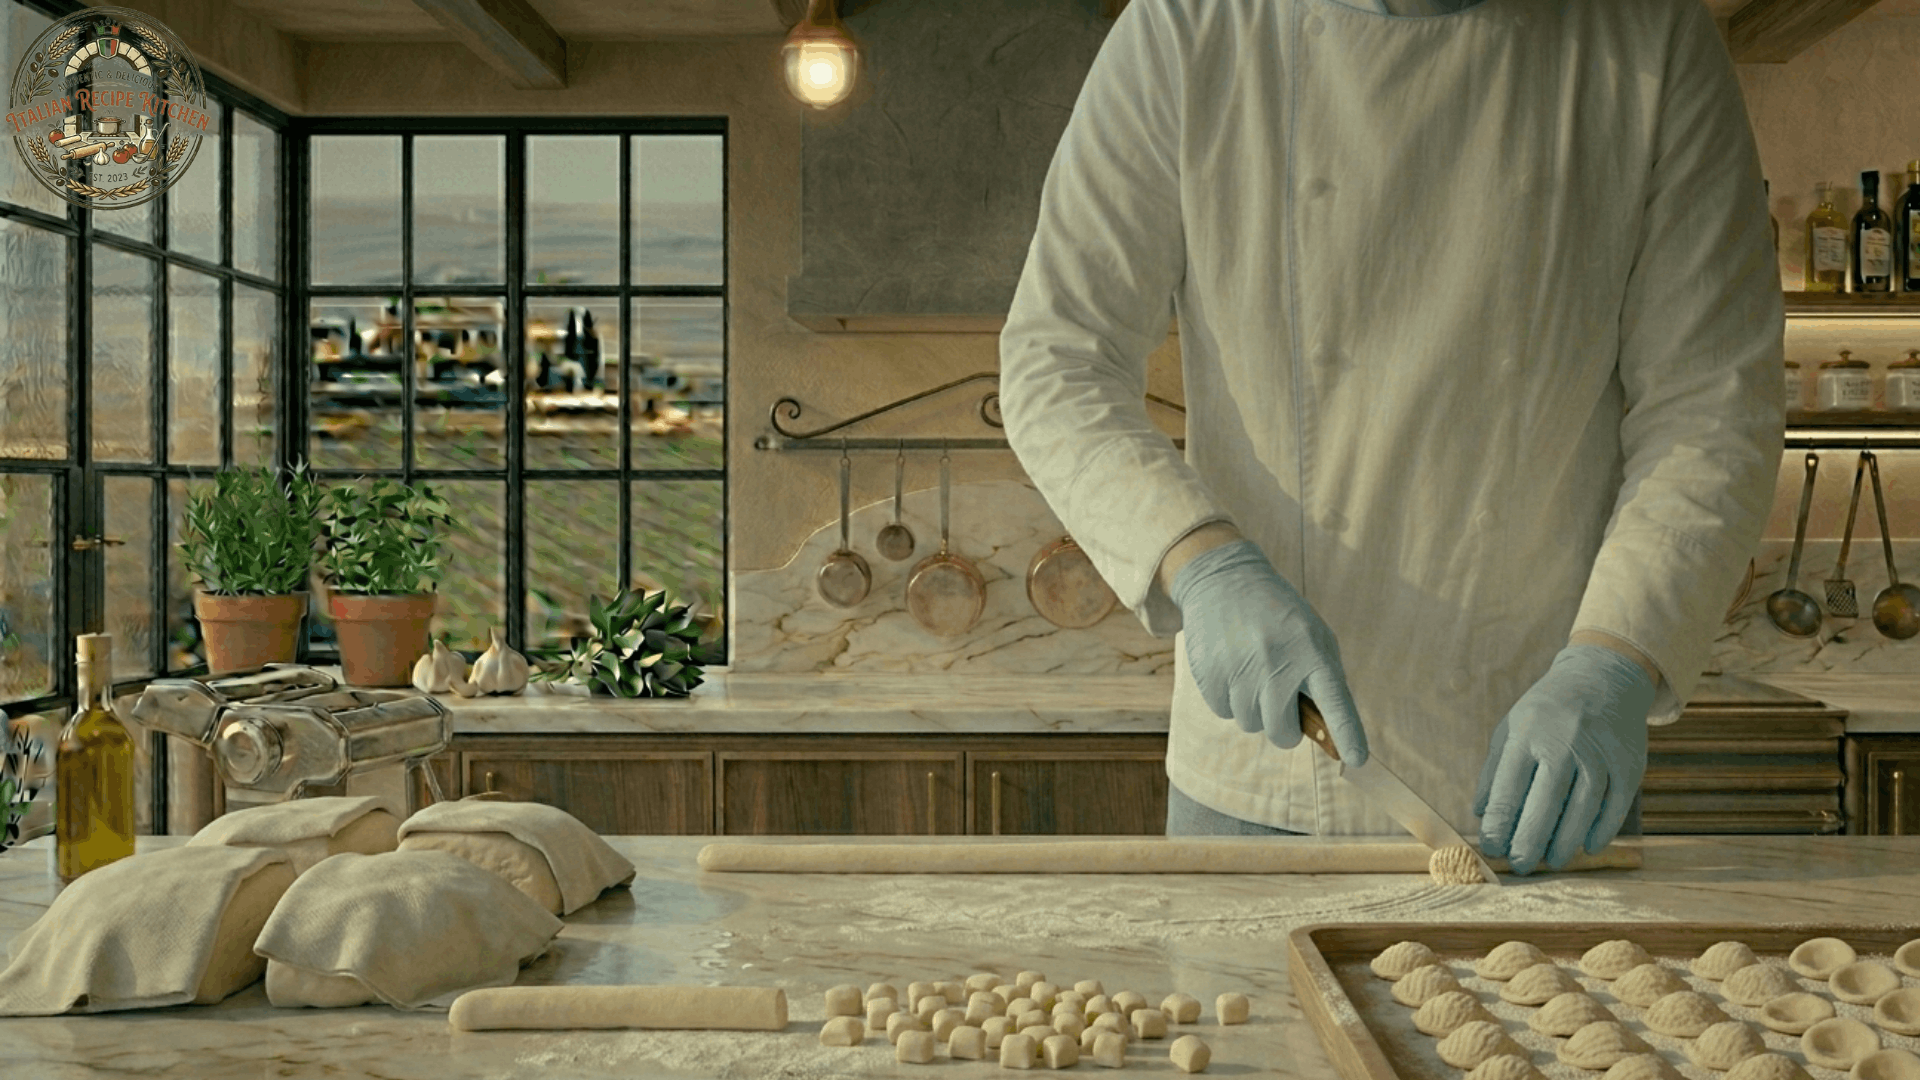
If you want to follow tradition, use a non-serrated butter knife with a round tip. It is light enough not to tire your hand, which matters when you are shaping a large batch.
Your pieces will look slightly uneven at first. That is perfectly fine and honestly part of the charm. Homemade pasta is never as uniform as machine-made, but the taste is in a completely different league.
How to Cook Orecchiette
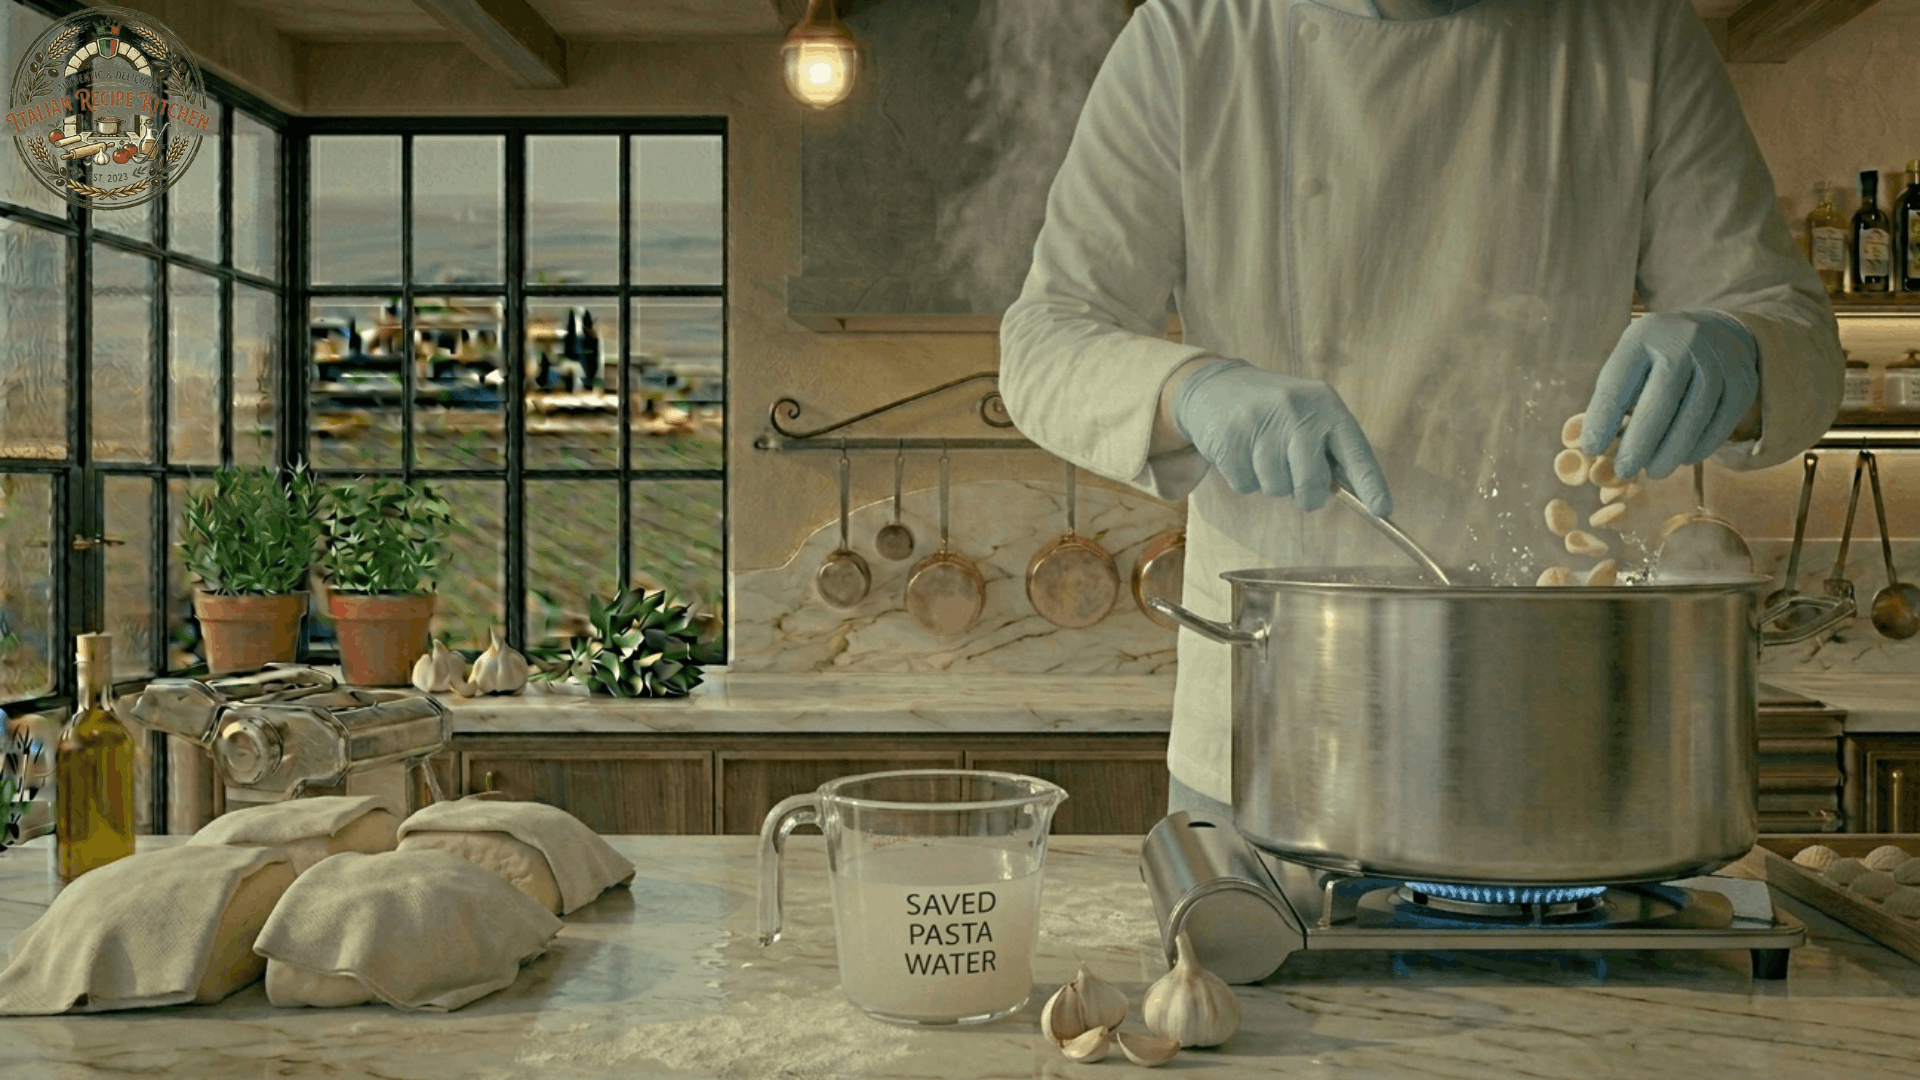
Bring a large pot of water to a boil and add a generous amount of salt. Drop in the orecchiette and stir gently to prevent sticking. Fresh homemade orecchiette cooks in about 3 to 5 minutes, depending on size. Cook until they are al dente.
Always save at least a cup of the starchy pasta water before draining. Adding a splash to your sauce helps everything bind together beautifully.
These are very easy steps that you can take to make it properly.
What Sauce Goes Best With Orecchiette?
The cup shape of orecchiette is designed to catch sauce, so it pairs wonderfully with chunky, hearty preparations. Here are the best options:
Traditional Pugliese Pairings:
- Orecchiette with cime di rapa (broccoli rabe) and anchovies, the most iconic combination from Bari
- Slow-cooked tomato ragu with pork or lamb
- Orecchiette con le braciole (stuffed beef rolls in tomato sauce)
Modern and Everyday Sauces:
- Classic pomodoro sauce, creamy broccoli sauce, cherry tomato with arugula, or fresh basil pesto all work wonderfully with this pasta shape. You can make what you would like to use with it.
- Sautéed sausage with rapini and chili flakes
- Roasted garlic with olive oil, sun-dried tomatoes, and capers
These are very easy steps that you can take to make it properly.
What to Avoid: Cream or butter-based sauces are generally not recommended for orecchiette, as they do not complement the chewy, rustic texture of the pasta.
In Puglia, orecchiette pasta is traditionally topped with toasted breadcrumbs rather than grated parmesan, which adds a lovely crunch.
Storage and Make-Ahead Tips
Freshly shaped orecchiette can be cooked immediately or stored easily for later use, which is best in taste.
- Same day: Spread on a floured tray and keep uncovered at room temperature for up to 2 hours.
- Refrigerator: Store in a single layer in an airtight container for up to 24 hours.
- Freezer: Spread orecchiette on a parchment-lined baking tray dusted with semolina and freeze overnight. Once fully frozen, transfer to sealed bags. This prevents them from sticking together, and they will keep for up to 2 months.
- Dried: Leave on trays in a cool, dry spot for 24 to 48 hours until completely hard. Store in a jar or airtight container for several weeks.
More Pasta Shapes and Guides
Once you master orecchiette, the world of handmade pasta opens up. These shapes are worth exploring next:
- Cavatelli: small ridged shells, also made with semola and water
- Trofie: twisted Ligurian pasta, perfect with basil pesto
- Pici: thick hand-rolled spaghetti from Tuscany
- Malloreddus: Sardinian gnocchetti with saffron
- Lorighittas: braided ring-shaped pasta from Sardinia
Each one teaches you a new hand movement and connects you to a different region of Italy.
Frequently Asked Questions
Can I make orecchiette with all-purpose flour?
You can, but the texture will be softer and less chewy. Semola rimacinata gives the authentic bite that defines this pasta.
Do I need a pasta machine to make orecchiette?
No. Orecchiette is shaped entirely by hand using just a knife and a board. No special tools are needed at all.
Why is my orecchiette dough too dry or crumbly?
Add lukewarm water one tablespoon at a time and keep kneading. Humidity and flour brand both affect how much water the dough needs.
Why is my orecchiette too thick?
Apply more pressure when dragging the knife and work with smaller pieces of dough. Thickness comes with practice, and the pieces naturally thin out as your technique improves.
Can I add eggs to orecchiette dough?
Traditional Puglian orecchiette never includes eggs. It is made only with semolina flour and water. Some modern cooks add eggs for a softer texture, but purists consider this a departure from the authentic recipe.
How long does it take to make a batch?
Expect about 1.5 to 2 hours for 400g of dough, including rest time. Put on a podcast and enjoy the process.
Can I cook orecchiette from frozen?
Yes. Drop frozen orecchiette directly into boiling salted water without thawing. Add about 2 extra minutes to the cooking time.
What is the difference between orecchiette and cavatelli?
Both are southern Italian pasta shapes made with semola and water. Orecchiette are cup-shaped, and shaping uses your thumb to flip the disc. Cavatelli are rolled and curled with your fingers into small ridged shells.
Final Thoughts
Homemade orecchiette is one of those recipes that rewards patience with incredible flavor and a real sense of accomplishment. The ingredients are almost absurdly simple, but the result is a pasta with texture, character, and a deep connection to Italian tradition. Make a big batch on a slow weekend afternoon, pair it with broccoli rabe and a glass of Primitivo, and you will understand exactly why generations of Pugliese home cooks have kept this recipe alive for centuries.